Tuesday, March 31, 2009
Prototype switch board
I drilled some holes for the switches and installed them.
This weekend I will solder some wire connectors together and attach them along with the fuses.
Here is two pics of what it looks like with Patches' rear power coupler.
If this new compact design works for ED I will make a new one for Patches as well.


This weekend I will solder some wire connectors together and attach them along with the fuses.
Here is two pics of what it looks like with Patches' rear power coupler.
If this new compact design works for ED I will make a new one for Patches as well.


Jen's R3 dome is delivered
Jen's dome came today that we got from JAG.
She is a proud mama.
Patches is having another out of body experience.

She is a proud mama.
Patches is having another out of body experience.

Monday, March 30, 2009
Sunday, March 29, 2009
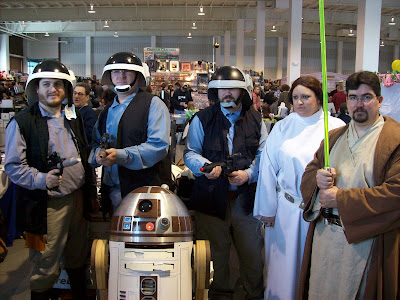
Planet Comic-Con trip
Just got back from Planet Comic-Con in Kansas City. It was a fun two days.
Patches meet more Mandos this weekend then all of his days combined.
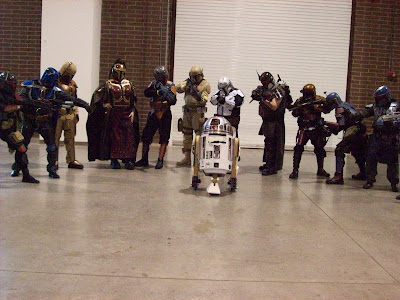 Lots of Rebels everywhere along with the 501st 70th and 80th garrisons.
 Meet a whole bunch of other droid builders from the Missouri area and talked droid through out the day.
 There were tons of props and costumes everywhere. I even got to try out a few.
 Lots of Celebs there as well, here is Jen with Sarah Douglas from Superman 2.
 Everyone took tons of pics and video, I will sort through them all tomorrow night after I get some sleep and post the GOOD stuff ;)
Friday, March 27, 2009
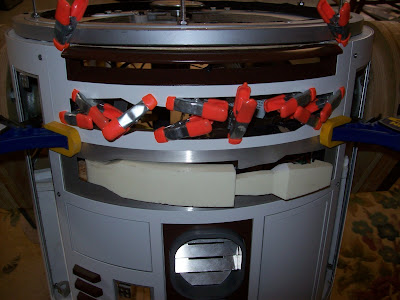
Patches has doors!
Well with the snow storm coming threw KC the same time we would be leaving for Planet-Comic Con we decided to leave tonight and get a room for an extra night ahead of the storm.
That means I had to rush to get Patches together today. The top arm skin looks good but I now do not have the time to let the bottom one dry so I risked using the fast setting TECH-Bond glue. Luckily all went well.
 I also used some 5 minute epoxy on the three doors that are not hot glued shut. I put the epoxy on the hinges and taped the doors in place and let them dry for two hours.
 With the Epoxy mostly set up I tested the doors and put another coat of epoxy on where there were gaps. By the time I get back home to pack up and leave everything should be dry enough I hope. Wish me luck! :)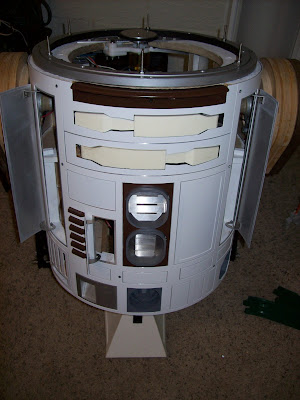
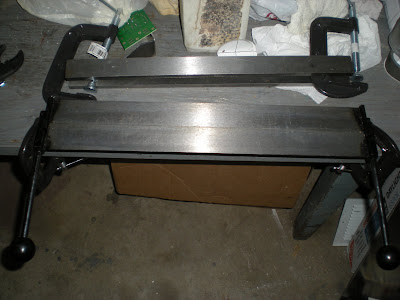
Brad's bracket
Last night Brad brought his frame over to work on the bracket that holds the center foot onto the frame.
 We measured everything out and got some straight and plum lines going.
 Brad then centered the center foot where he wanted it and drew some more lines.
 Brad then cut the opening, marked the rails, and drilled the mounting holes. Next week we will start welding some steel!
 We measured everything out and got some straight and plum lines going.
 Brad then centered the center foot where he wanted it and drew some more lines.
 Brad then cut the opening, marked the rails, and drilled the mounting holes. Next week we will start welding some steel!
Thursday, March 26, 2009
ED's power center
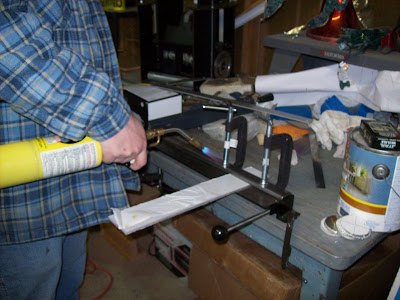
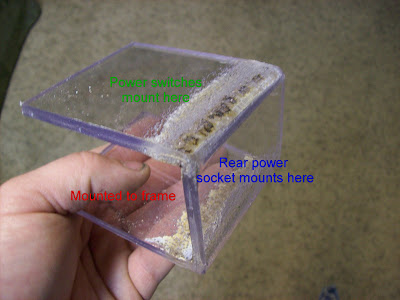
I started to make a custom bracket out of plastic for ED to hold the power switches and hold the back of the rear power coupler.
I put the plastic in the Break and heated it up with a torch.
 As the plastic softened I put a 90 degree crease in it twice.
 Here is what it looks like after cutting it to size but before clean up.
I put the plastic in the Break and heated it up with a torch.
 As the plastic softened I put a 90 degree crease in it twice.
 Here is what it looks like after cutting it to size but before clean up.
Jen's R3 Shoulder Mounts
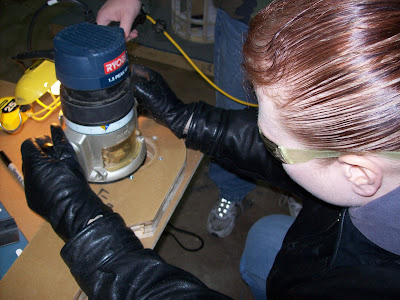
Jen bolted on her pipe flanges to the wood shoulder pieces then ground the bolts flush.
 Next she routed out a recess for the electrical plate washer.
 After checking the fit she got ready to bolt everything together.
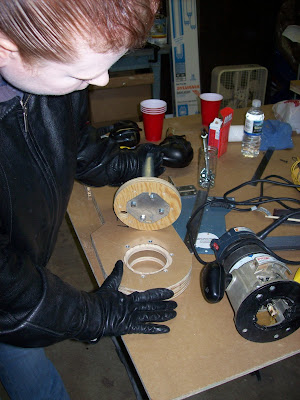 All my ratchets are at work so she had to tighten them the old fashioned way lol.

 Next she routed out a recess for the electrical plate washer.
 After checking the fit she got ready to bolt everything together.
 All my ratchets are at work so she had to tighten them the old fashioned way lol.
Dry time
Even with two days left I had to start gluing the panels on, cured or not. I am using an aluminum silicone for this instead of the Tech-Bond because I needed some wiggle time to position the pieces. The TECH tacks instantly aluminum to aluminum no matter what.
The silicone I am using takes 24 hours to cure :(
Hopefully it turns out ok and the clamps do not chip the paint.
The silicone I am using takes 24 hours to cure :(
Hopefully it turns out ok and the clamps do not chip the paint.

Wednesday, March 25, 2009
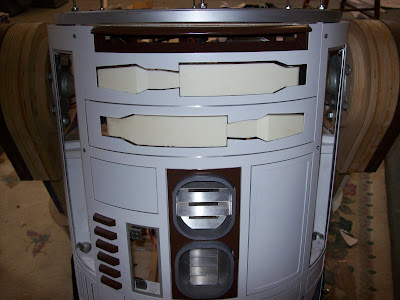
Within Arms Reach
Still need to let the paint cure another night but the skin pieces look good.
 I started to sand one of the utility arms to fit the skins, I only sanded the top and bottom sides making sure to leave the front face of the arm alone.
 A little more sanding and they will have tons of clearance when they open and shut on the back side.
After this weekends event I will take off the arm and finish sanding it and prep it for filler then paint it. I still need to make permanent holder brackets for the arms so they do not shift around so much.

Center foot holder
The other night Brad and I made some center foot holders for our frames. He cut his at 12 inches so they will fit the hole in the bottom of his frame. I only made mine 8 inches as I did not cut a hole in my bottom plate. I will also be attaching these bars under the frame instead of inside so the inside bottom of the frame is nice and flush.
Here is a picture of my bars.

Here is a picture of my bars.


Tuesday, March 24, 2009
Foot bends take one
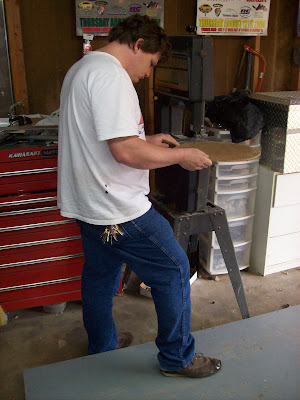
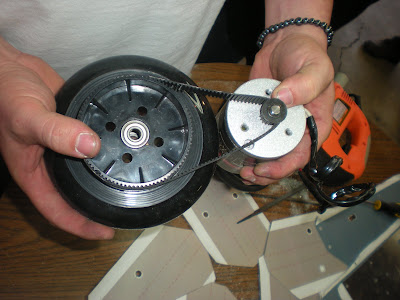
The group got together again this cold night to work on the motor mounts. Steve brought back his metal lathe and we all took turns spinning spacers.

 We also test bent one of the brackets on a cheap brake.

 Cheap is right, it broke after bending one. LOL
 We will finish them up next week then :)

 We also test bent one of the brackets on a cheap brake.
 Cheap is right, it broke after bending one. LOL
 We will finish them up next week then :)
Leg joints
I added the four "+" pieces today, once painted it will look like the legs swivel on them like a joint.
Later I will fill the top of the holes with resin so they look solid.

Later I will fill the top of the holes with resin so they look solid.

Paint work
Got two coats of paint on the utility arm out skins late last night. It is cold and windy now so I brought them inside to cure. Hopefully they are cured enough by Friday afternoon so I can put them on.


Monday, March 23, 2009
More skin work
Also during my lunch break today I sanded the tabs on my outer utility arm skin pieces and prepped them for paint. I shot them with primer twice and left then to dry till after work.


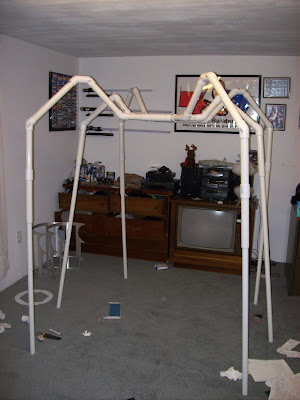
Long Legs
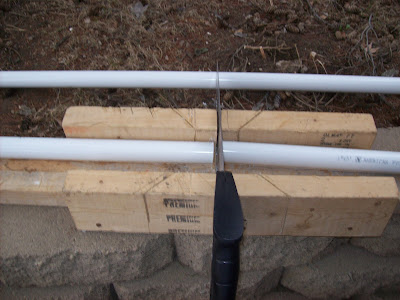
During lunch I went home to and installed the smaller feet pipes and marked them to the length I wanted. I went ahead and took a pic of it with the whole pipe on, it almost touches the ceiling!
 I cut them to length the old fashioned way and reinstalled them
 Here is a scaling picture with ED in the background so you can see the finished height.
Just need to glue a few more pieces on and the frame is done.

 I cut them to length the old fashioned way and reinstalled them
 Here is a scaling picture with ED in the background so you can see the finished height.
Just need to glue a few more pieces on and the frame is done.

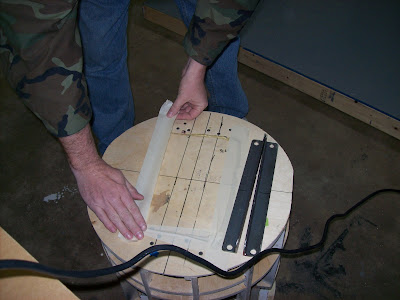
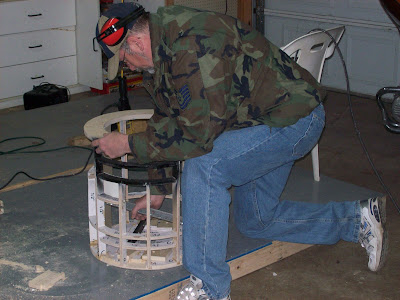
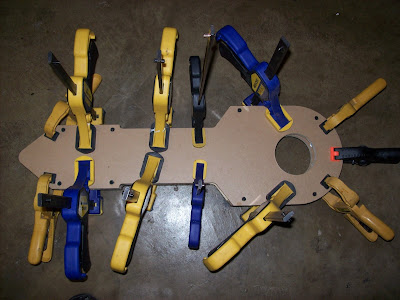
Jen's R3 outer legs
The other day we showed Jen how to glue up one of her outer legs using the custom jig the group made.
 Tomorrow she gets to glue up her other one, I think we need more clamps. lol
 Tomorrow she gets to glue up her other one, I think we need more clamps. lol
Sunday, March 22, 2009
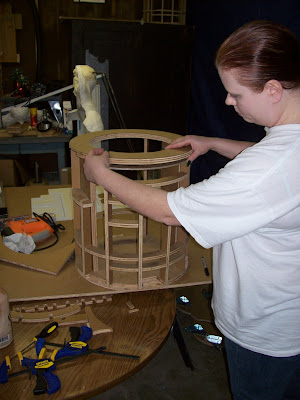
Jen's R3 Frame
Today Jen and I took her newly acquired frame #4 apart to replace a few of the pieces that were cut wrong or broken.
 I showed Jen on one piece how to cut everything out on the scrap wood...
 and she did all the rest by herself with no problem.
 We also had to make some spacers for where a router bit drifted long ago threw the top side of the frame when LC and I originally made it.
 After Jen cut all her parts she reassembled the frame. Everything lines up nice and straight now.
No longer is the frame Quazi-modified LOL.
 A few little pocket cuts for the large data port, coin slot, and the coin returns and it is ready to be glued together.
Saturday, March 21, 2009
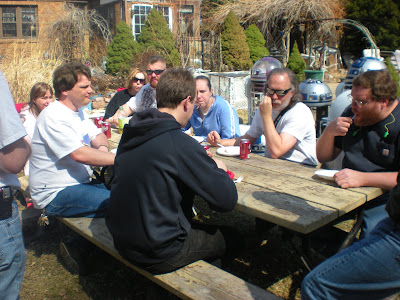
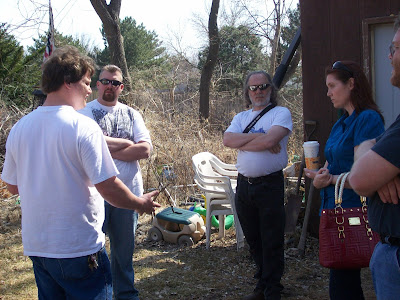
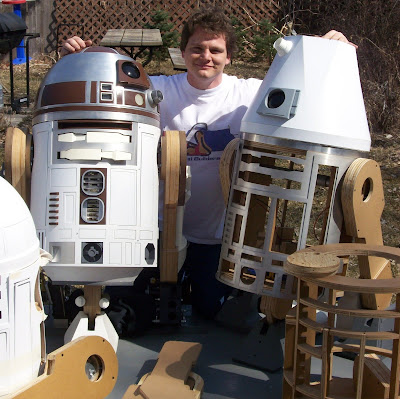
R2-Central's one year anniversary.
Surprising how much happens in one year, today we had a little barbecue and build day for the group, everyone brought something to eat and their R2s.
Left to right is... Talon, Steve, Clay Jayson, Brad, Jason, Moose, and Jen.
Droids Left to Right in the back row is... First Two are Talon's, next is Clay's, then Brad's , and the last two are mine.
Droids Left to right in the front row are, Jason's, then Jayson's, another one of Jason's, and the last one is Jen's.
 Everyone was busy as bees working on all sorts of different projects threw out the day....


 Steve brought his metal lathe so we could make custom spacers for our motor mounts.
 Steve showed LC, LC showed Talon...
 Talon showed me...
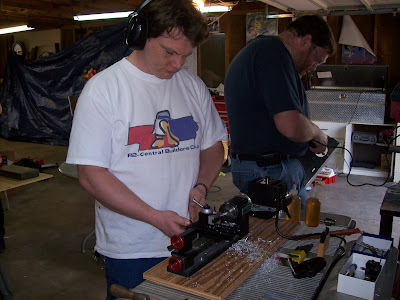 I showed Jen...

 We all took the time to enjoy the warm spring weather that finally showed up.
 LC cooked up some burgers and the rest of us brought some side dishes to eat.
 Brad's wife even made us an R2 cake! YUM!
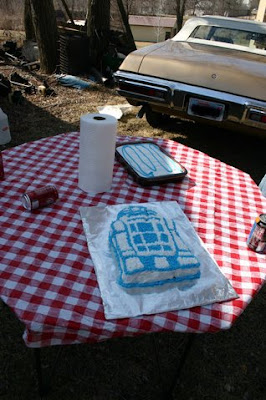 Also we had a few guests like this lady from the CREATIVE Robots society who wanted to know more about what we do.
 Patches and Ed were even enjoying being outside for a change :)
 Once I get all the photos from the other builders I will post more about what we did today.
Left to right is... Talon, Steve, Clay Jayson, Brad, Jason, Moose, and Jen.
Droids Left to Right in the back row is... First Two are Talon's, next is Clay's, then Brad's , and the last two are mine.
Droids Left to right in the front row are, Jason's, then Jayson's, another one of Jason's, and the last one is Jen's.
 Everyone was busy as bees working on all sorts of different projects threw out the day....

 Steve brought his metal lathe so we could make custom spacers for our motor mounts.
 Steve showed LC, LC showed Talon...
 Talon showed me...
 I showed Jen...
 We all took the time to enjoy the warm spring weather that finally showed up.
 LC cooked up some burgers and the rest of us brought some side dishes to eat.
 Brad's wife even made us an R2 cake! YUM!
 Also we had a few guests like this lady from the CREATIVE Robots society who wanted to know more about what we do.
 Patches and Ed were even enjoying being outside for a change :)
 Once I get all the photos from the other builders I will post more about what we did today.
Subscribe to:
Posts (Atom)