Saturday, January 30, 2016

More upgrades

Had a warm winter day so did some cleaning and organizing today. Got all my old batteries that are no longer good together that are no older than 5 years old. Dam that is a lot of money gone! Oh well, love to make people smile. :) Need to get some new ones soon for the summer and Britishfest convention.
 Finally hung up my new wire organizer. Glued a few craps of plywood together and nailed them to the studs. Also put a space filler on one side.
 Once the organizer was hung and leveled I added some custom built in wire holder above the new one. I drilled directly into the studs to fit 3/4 inch dowel rods.
 With the bought and custom made wire holders in place I no longer have to go hunting for the correct wire. Once I get around to wiring up BB's head I have a nice station to do it at. :)

Painted the back side of the logo today with one of my Dalek gold test colors and hung it up. Will eventually make a frame for it this summer once I replace the Workshop's siding. Happy with it for now. :)
P.S. Notice the light. lol

Friday, January 29, 2016

Here's your sign!

Making a waterproof sign for outside of the workshop. So far here is the vinyl work I had made. :)

Thursday, January 28, 2016

BB's outer body is done

Tonight after sanding and cutting while the weather was a bit warm out I then added the last details of BB's outer shell.
So I had to take some pics with the other astromechs with his old head on. :)
This weekend I start on his new head. :)


BB's body almost done

BB's small body details are being added. This weekend I get back to the dome.

Monday, January 25, 2016

Starting over on BB's dome

I was not happy how the detail lines were coming out on my styrene dome so I decided to go a different route. Lord knows I tried my best the old fashioned way by hand but the older I get the more my hands shake so carving curves on a soft curved surface is becoming more of a challenge. So here is what I got so far for the new dome.....

Small BB update

BB's logics and PSI lens for his head. :)

Monday, January 18, 2016

BB-8 meets the rest of the family

Got BB's neck ring started on and Patches' new battery boxes ready to install!
The rest of the family accepted him with open claws...er plungers...er you know what I mean.

BB-8's Body!


Saturday, January 16, 2016

Friday, January 15, 2016

Hording wire

Getting my wire collection organized as there is wire everywhere in the garage and house. Getting it all in one organized location will help speed up all the electronics work I got planned for this year. Got this wire holding rack for the new wire I got and custom making another for all my other loose spools of wire to go with it. More updates later when the weather warms up.

Tuesday, January 12, 2016

Monday, January 11, 2016

Making molds 101

I got tired of pouring one resin Dalek ring at a time. As I need 56 of them for just one Dalek it would take way to long to get them all done. So I decided to make two extra molds to make the work go faster. Making a mold is easy, just a flat surface and some strips of wood. Some people use Legos but I prefer my molds to have a flat smooth bottom and walls.


 One the framework is together and sealed with hot glue so no material can leak out the jig, mold compound is then added with the piece to be duplicated centered in the jig. Always pour to the lowest spot first pouring from as high as you can to get rid of bubbles in the mix.


 Pouring three seals up at once makes things go a lot faster! Any left over resin from each pour is put into another mold of parts I still need for my builds.


 The finished product! A full Dalek bump with the black ring! Only 44 left to go!


Saturday, January 9, 2016

Lower Kitchen Cabinet

Today I installed the lower cabinet the correct way. I had to cut an inch and a quarter from the bottom  of the kick area so the two cabinet heights match. Once installed and the temporary top put back on you can see I will gain an inch of height under the upper cabinets which will be a big plus!
Also got all the cove molding installed but forgot to take a picture. :)


Friday, January 8, 2016

BB-8's first update

Though I like to make as many parts for my build from scratch, for this build I splurged a bit and had a friend print me up a few parts that would have been to hard to carve myself with my limited tools.
The parts look great and I can't wait to add them to BB's head!
Next week you should see an update on the body and dome. :)


Wednesday, January 6, 2016

What a piece of Junk! - Luke Skywalker

As much as I could use a new chop saw it just is not in the cards right now as I just got the new table saw. I defiantly don't want to get a cheap-o one again. So instead I decided to make my old one usable again that was being used as a make shift angle iron cutter for welding projects.
First I cleaned it up a bit and took apart what I could. Making sure the blade and fence were 90 degrees from one another I reset all the dials to 0.


I made a taller back fence for cutting molding out of cabinet grade plywood being sure to countersink the bolt holes so the bolts and washers are below the surface.


I then took the stock blade that came with my new table saw and installed it in the chop saw. I also took the blade shield with the clear plastic front part that was almost cut in half and cleaned up the cut up edges and put clear packing tape on it to hold it together again.


After reinstalling the protective shield and making sure it worked right I took the big red knob for changing the angles and fixed it. It was cracked and the end cap kept popping of so I used some red electrical tape to hold it all back together.

Testing out the saw I made two 45 degree cuts through the new wood fence, I checked all the angles again and everything still lines up. Later I will put the side support rails on when I get back to doing the molding for the kitchen.

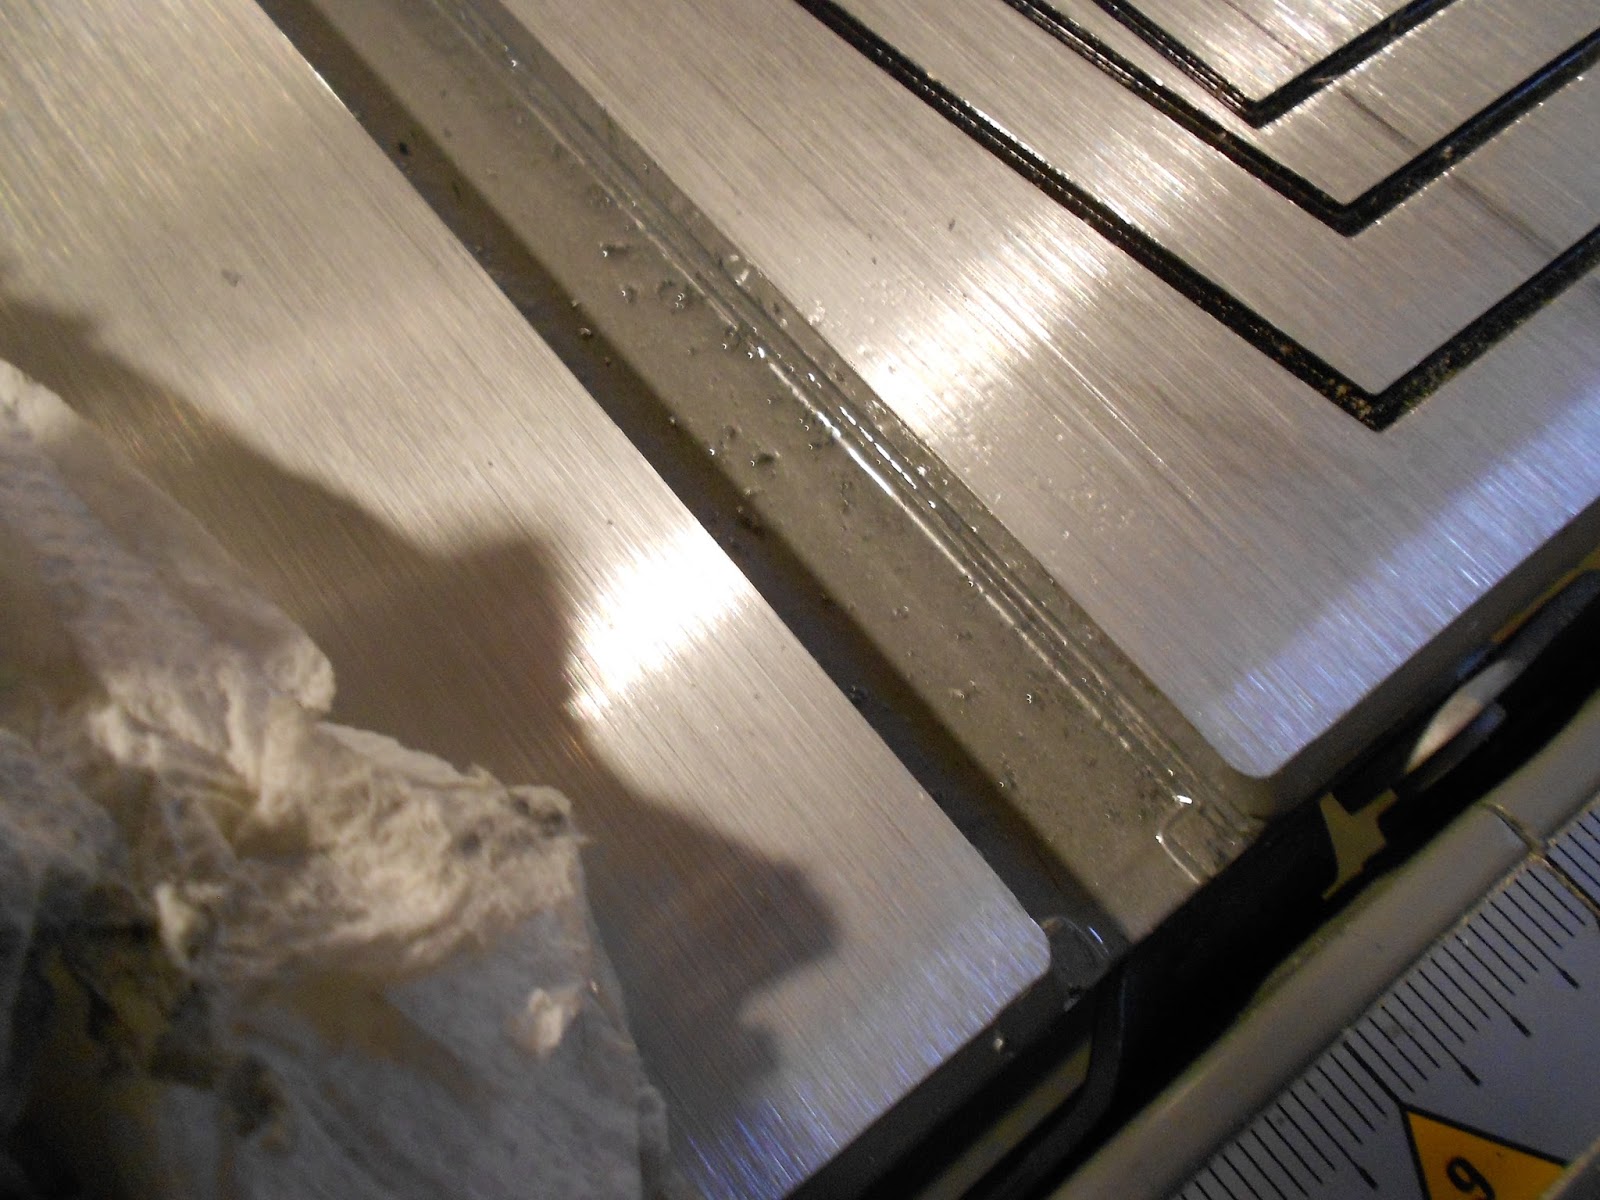
Once the chop saw was done I turned my attention back to my new table saw and continued to scrape the paint out of the bad miter slot. This is my fourth time scrapping with paint thinner and I am still getting this much paint out of the rail! It is sliding fine now but need to get a hair more paint out so the miter rail runs flush with the surface of the table.

When I was done dinking around with the painted slot, I  made a fence extension for the miter gauge in the good slot being sure to recess the bolt just like before.

Monday, January 4, 2016

More work on the kitchen

Had some time today before it got dark so I got some more work done in the kitchen. I took down the rest of the thin crown molding and boxed in the tops of the newer upper cabinets. I pre-drilled and countersunk for the screws so there is no splitting and a bit of wood filler will hide the few screws you will see whenfinished.
I got one piece of the new crown molding installed but my chop saw is just a cheap one from 10 years ago and is not good for cutting anything more than flat stock. So I will need to make a fence jig so I can cut compound angles or just get a better saw.
I did finally get a new table saw after Frankensteining my old one back together so many times. The new saw cuts great, he only problem I see so far it that the miter slot on the right side was not cut right and the miter gauge will not slide in it. Hopefully I can find a metal file thin enough and run it in the miter hold down slots to fix it.

Sunday, January 3, 2016

BB is a go!

It is official, I have the go ahead to build a BB-8 from the new Star Wars movie!  That is after I finish my NSD Dalek and a few other little things. lol It should be fun as it is a totally different kinda drive system that I have never built before. This will be the first astromech that I have built that will not be a custom color. I like the orange! :) By the time I do all the research and blueprint making for BB my second Dalek will be finish.

Kitchen improvements

Doing some kitchen storage improvements, some like to use the word remodel but to me that would mean stripping everything out and starting with all new cabinets. No, we like out small kitchen the way it is. It just needed some more storage and a much needed dishwasher. Currently I got the dishwasher installed and working and the upper cabinets installed and level. Still got to box the top of the new upper cabinets in to match the others then change the molding to something nicer. Added new sink fixtures but this coming spring we will change the entire counter top.
On the other side of the kitchen we are putting in a pantry. I need to make a custom cabinet for the narrow space in between it and the stove as there is no such stock sized cabinet. All the door knobs will be replaced and everything painted white. :)
Please excuse the fridge. lol